How to Use a Raspberry Pi Instead of a USB Console Cable
As the title says, this article will be about using a Raspberry Pi SBC (whatever model), instead of a USB Console Cable to debug another SBC, router, microcontroller… The need for this came when I received my MangoPi MQ-Pro, I wanted to try different operating systems for this SBC, but I didn’t have access to a USB Console Cable, at least not one that was 3.3V tolerant. I wanted to have access to the serial console because a lot of OS images for the MangoPi, at the time of writing this article, didn’t have HDMI drivers. I have already used a Raspberry Pi to flash and interact with micropython on an ESP8266, so I thought, why not use the same method to interact with my new MangoPi.
This method can also be used to interact with the serial console of another Raspberry Pi, ESP8266, router… or any other 3.3V tolerant UART.
Wiring things up
The wiring for this setup is really easy. The grounds of the two devices should be connected to each other, and the RX of the Raspberry Pi should be connected to the TX of the device to debug (a MangoPi in this case), and vice versa for the TX. The MangoPi uses the same 40-pin GPIO layout as a Raspberry Pi, so the same awesome pinout guide can be used as the Raspberry Pi. For other boards (ESP8266, routers, microcontrollers…), the documentation of those devices should be consulted.
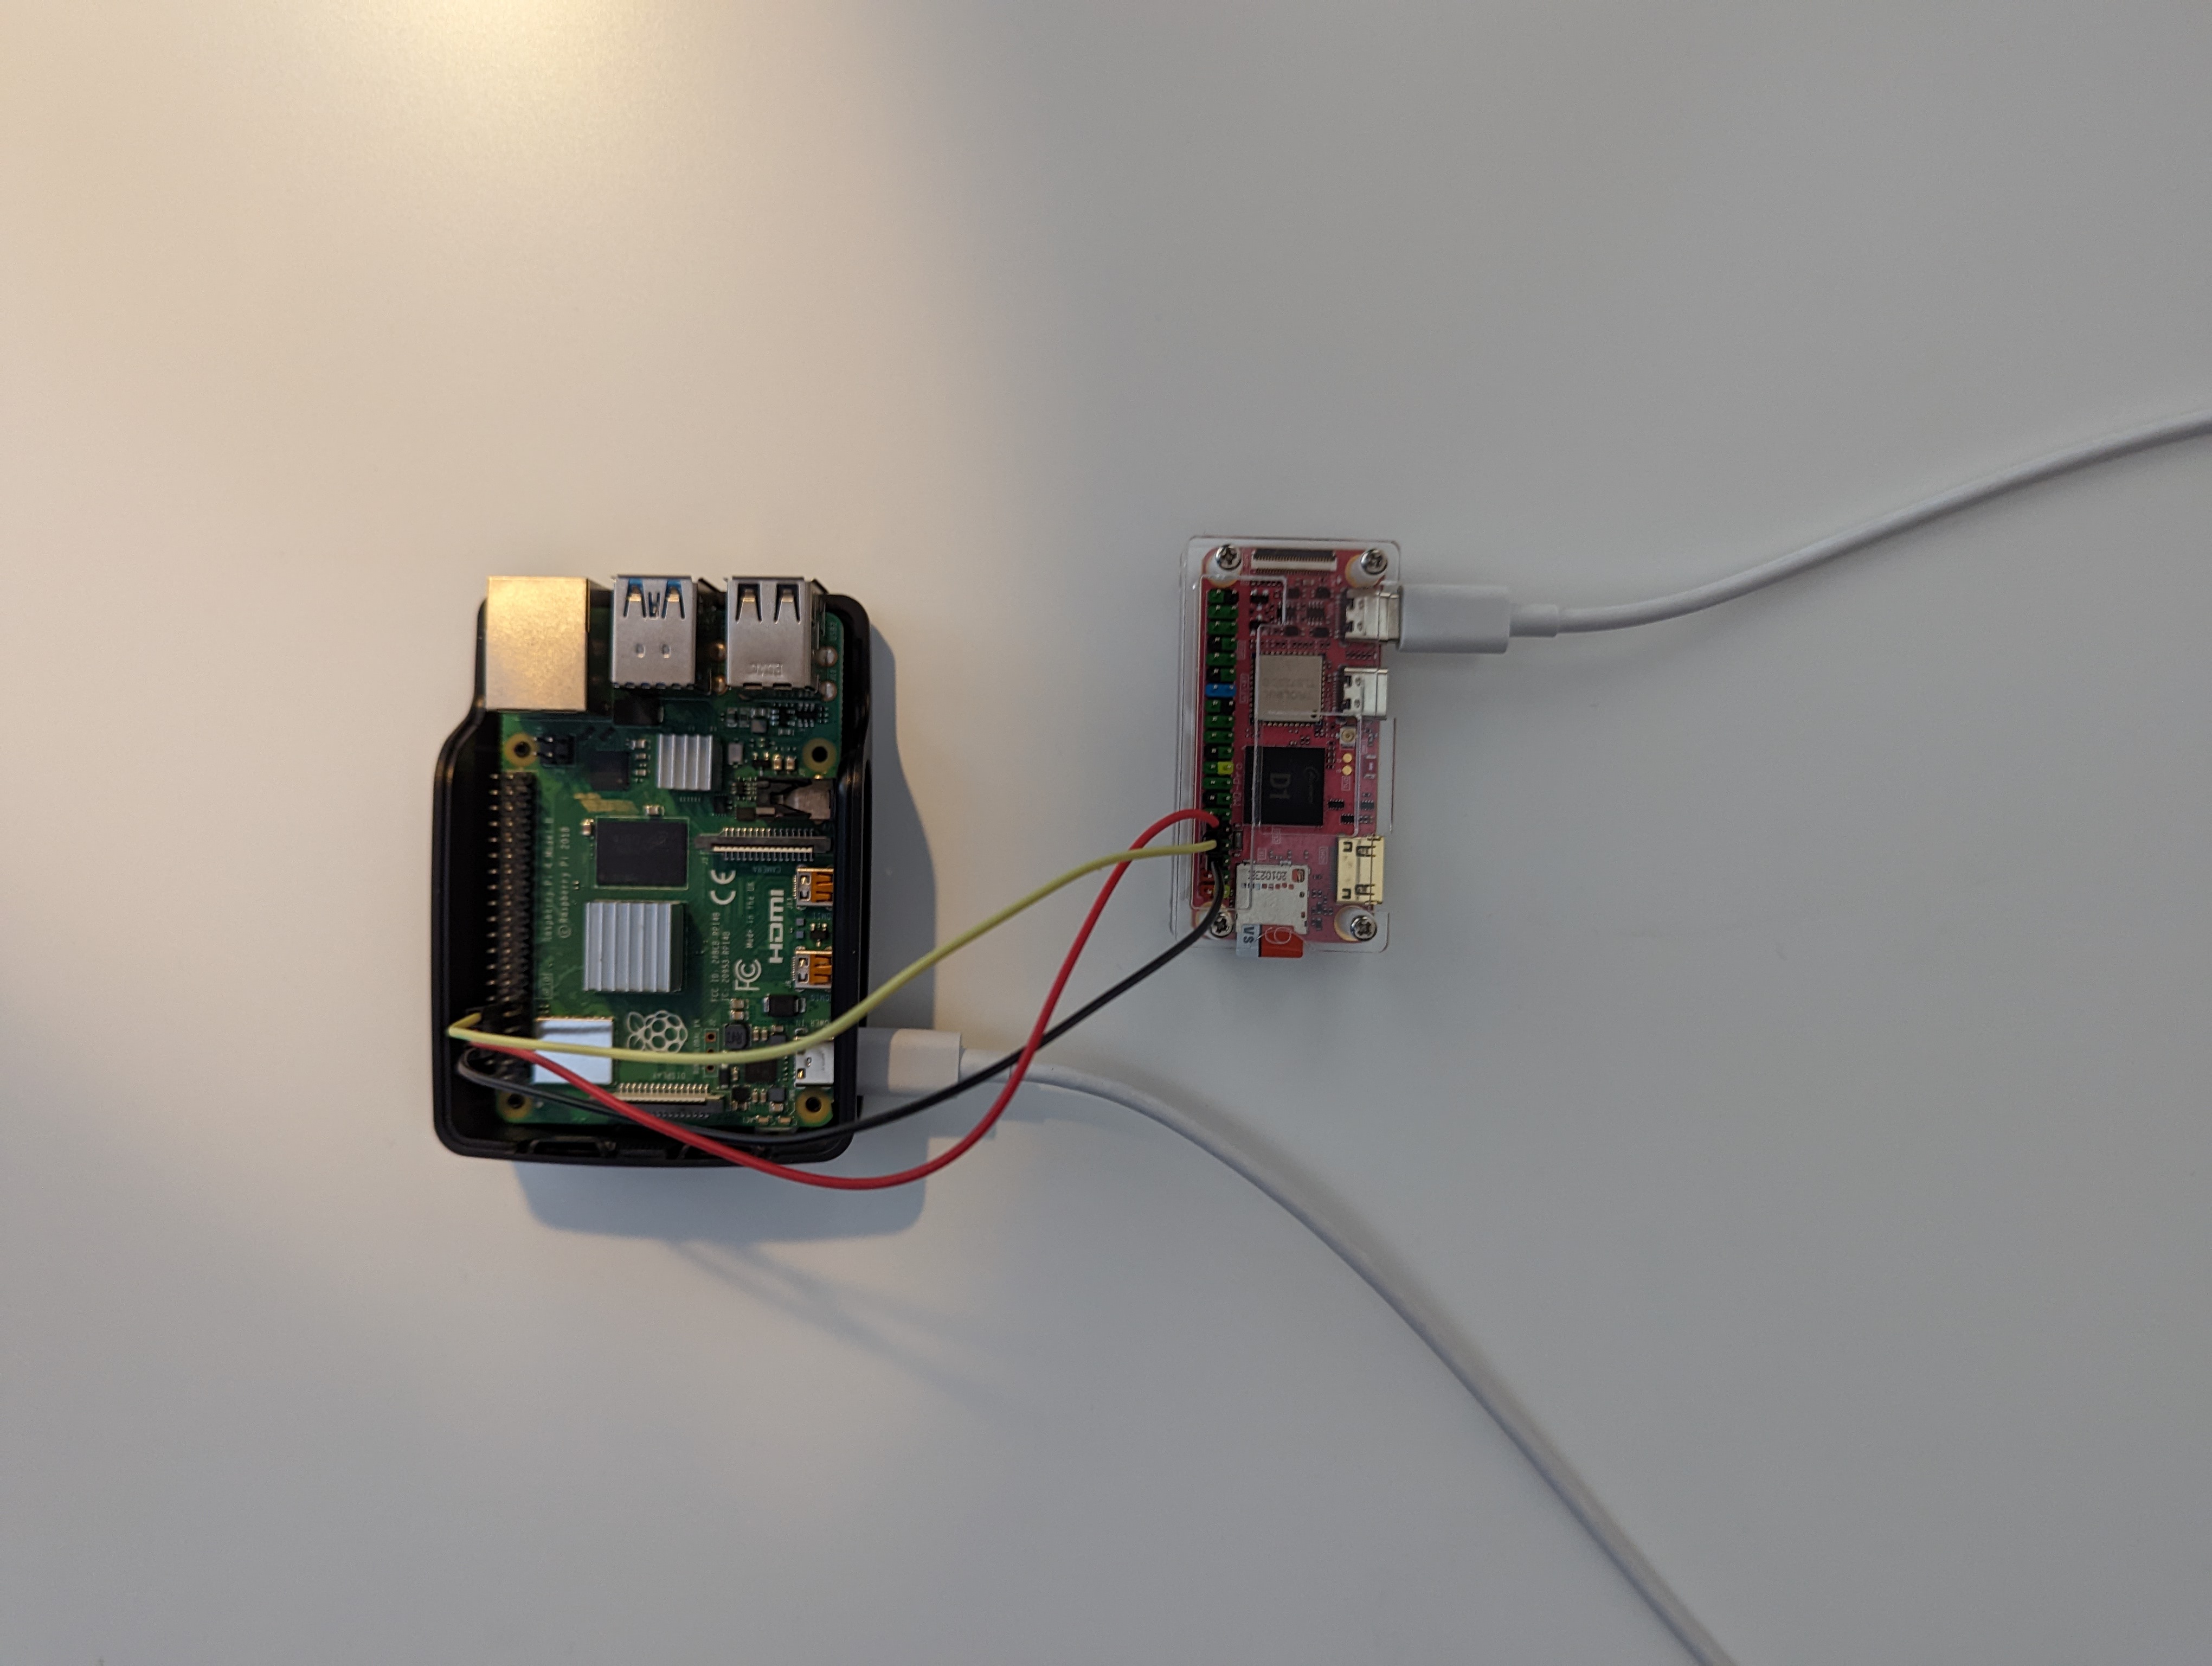
The wiring should look like this:
Raspberry Pi GND ---> MangoPi GND

Raspberry Pi TX  ---> MangoPi RX

Raspberry Pi RX  ---> MangoPi TX
Enabling the serial hardware on a Raspberry Pi
The Raspberry Pi can be easily configured to enable the serial hardware with the raspi-config utility at the time of writing this article.
- Start raspi-config:
sudo raspi-config - Select option 3 - Interface Options.
- Select option P6 - Serial Port.
- At the prompt
Would you like a login shell to be accessible over serial?answer ‘No’ - At the prompt
Would you like the serial port hardware to be enabled? answer‘Yes’ - Exit raspi-config and reboot the Raspberry Pi for changes to take effect.
An important note about Raspberry Pi’s with built-in Bluetooth (3B(+)/A+, 4, 400, Zero (2)W)
As described on the Raspbery Pi docs, the Raspberry Pi has two types of UART; PL011 and mini UART. On Pi’s without built-in Bluetooth, the PL011 is the primary UART. On Pi’s with built-in Bluetooth, the mini UART is the primary UART, while the PL011 is connected to the wireless LAN/Bluetooth controller. The problem is that the limitations of the mini UART causes issues when accessing the serial console of another device. When accessing the serial console of the MangoPi for example; the boot-logs are shown, but after this the console just hangs. Of course, there is a solution for this. If you don’t need Bluetooth, the Bluetooth hardware can be disabled, so the primary UART becomes the PL011. This can be done by adding dtoverlay=disable-bt to the /boot/config.txt file and disabling the service that initialises the modem: sudo systemctl disable hciuart. After a reboot the primary UART is also the PL011.
Accessing the serial console
Now all the preparation is out of the way, nothing stands in the way for us to access the serial console of our MangoPi (or other device) via our Raspberry Pi. I personally like the program picocom to access serial devices. This can easily be installed on Raspbian:
sudo apt install picocom
To access our device, we just need to execute one of the following commands:
picocom -b 115200 /dev/ttyAMA0
# or
picocom -b 115200 /dev/serial0 # serial0 is just a symlink to the first UART (ttyAMA0 in our case, or ttyS0 if you didn't disable bluetooth on a Pi with Bluetooth)
Now you should have access to the serial console of your 3.3V tolerant device in need for debugging! To escape the console, the hot-key for picocom is Ctrl+A, so to exit, just press Ctrl+A, Ctrl+X.
Enjoy your serial console!